
A couple weeks ago Pat asked if I would join her in a simple blog hop, um ya! Of course I’m in. I had the pleasure of meeting Pat at Market last month, and she is so much fun and sweet too! If you haven’t listened to her Monday radio show – you should – she’s always talking to someone new in the quilting industry, and loves to connect with listeners via her blog too.
Enough about Pat…I’ve got some fun stuff to share!

Our theme song for the day –
What is your most interesting or unusual item in your studio?
The most interesting or unusual item in my studio, is the fact that one might call it a studio! I sew at the kitchen table, and don’t have a stash to speak of really! (gasp) For this moment in my life, and our family life – it’s the biggest hurdle and asset, as I keep track of our four kids around the clock. It also means that I have to keep things tidy, as much as possible, and clean up constantly. Which is a good thing, because when stuff gets out of hand, I just don’t function very well. Thankfully my kids are good at ganging up on chores and getting them done with me.
My quilty slice of the kitchen resides here:

The printer cart was re-purposed for fabric and sewing machine storage, and the dresser has been a huge improvement in kitchen storage space. I have two drawers for fabric and little bits, and the rest of the drawers hold sheet pans, and other kitchen essentials, along with one drawer for coloring books and crayons/paints for the kids. Both pieces are unusual for the space, and for studio spaces I believe!
Who would you like to hang out with for a day and why?
I would love to hang out with…my first thought was all my blog friends, or even just myself, as our days are very full, and I rarely have a moment to think! But the one person I would most love to hang out with for a day is Amy Poehler. If you haven’t been watching her show “Parks & Recreation” – I highly recommend it for a good laugh!
I would love to hang out with Amy because she’s hilarious, but also creative, and a down to earth mom too! Imagine the great and crazy ideas that could be dreamt up in an afternoon. That would be fun!
Top tip or tutorial?
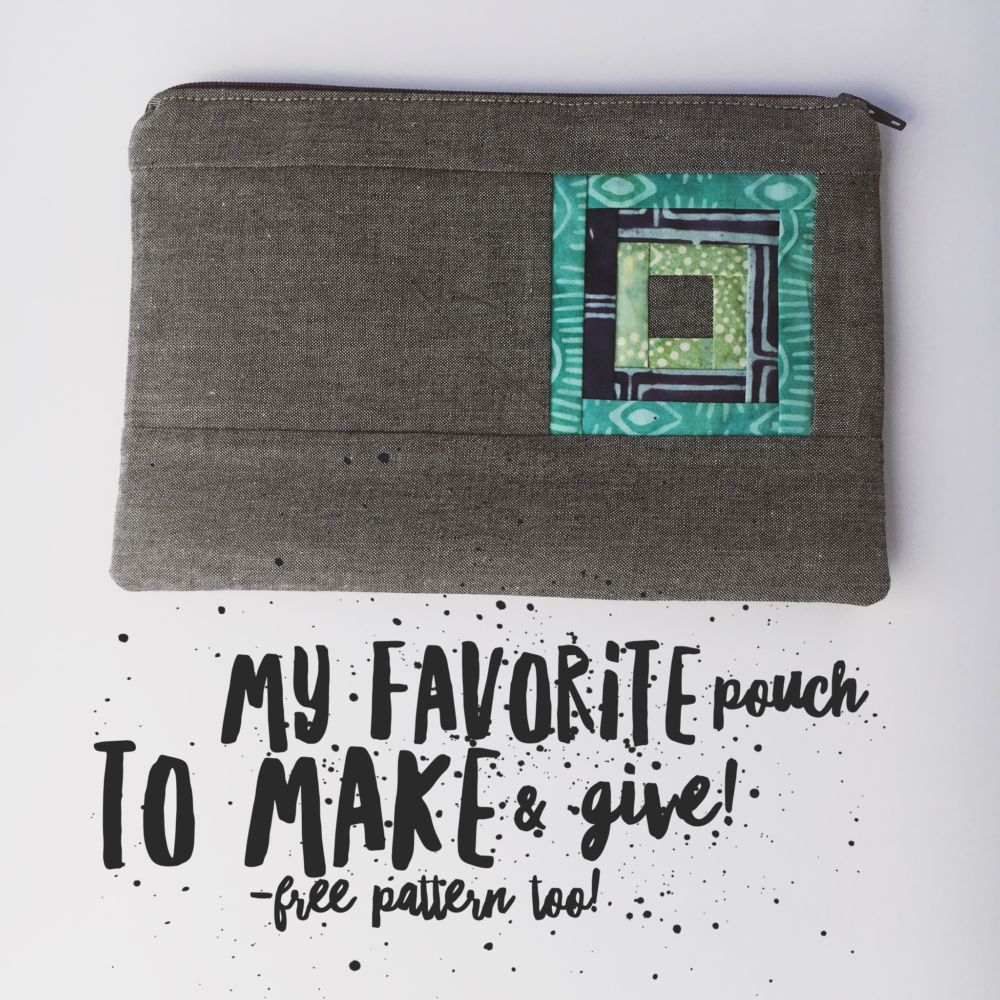
I’ve recently made a few zip pouches, and loved the outcome. But, there’s always a little slippage as I sew the zipper in, no matter how many pins I’ve used…minor problem, that I wanted to find a solution for. Fast forward a week, and I was given some Lapel Stick to try out and share with my readers (giveaway soon). So I started thinking about what I could make, while using the Lapel Stick. I’m sure you can see where this is going, I realized that it would be perfect for sewing a zipper in place! And let me show you how great the results are!

So here’s what you do –
First, gather a zipper, fabric, and cutting mat with ruler/rotary cutter.
My zip was 12″, but I cut my fabric to the length of the entire zipper, which allows for seam allowances. My cut length was 13 1/4″.

Next, cut fabric to length, and the desired height of your bag. My pieces are 9″ and 3″. Then cut lining pieces to match the exterior. It all really depends on the size of your zipper!

Using some paper, I found in the kids’ drawer, protect your cutting surface and apply a generous layer of Lapel Stick to one side, of the zipper. I started on the back.

Then, with your fingers apply the right side of the lining fabric to the backside of the zipper where you applied the Lapel Stick.
And repeat with the exterior fabric on the front of the zipper.

After you are sure, everything is just where you want it. Walk away for five minutes. Go put your zipper foot on your machine and make sure things are ready there, while the Lapel Stick has a chance to dry and set. Then Sew!

I was so pleased – I forgot to stop and take a picture! There’s no pins to remove as you sew, no pulling or bunching, just a quick seam to set the zipper into one half of the bag!

Press the fabric away from the zipper, and repeat the process for the other side.

Don’t forget to walk away for a few minutes while it sets – get a drink of water or bit of chocolate. What ever you need to keep going!

Press your fabric away from the zipper and you are ready to finish up! I’m so happy with how well the zipper went in, it was fast, and I didn’t get a single poke!
But – I didn’t get to finish either, you will have to come back and see it later this week. I was busy making preparations for this birthday boy – 
That expression on his face – says it all! He had a great day!
—–
Go and visit these lovely bloggers and see what is lurking in their studios, and who they would like to hang out with!
If this is your first visit here – I’m so glad you stopped over! You can subscribe to my feed if you would like to keep up with me and all that I’m working on!
I have a couple other ideas to share for using Lapel Stick – hopefully I will have that for you tomorrow!
Amy

I’m a regular follower of your BLOG! You do a great job in the small area devoted to you in the kitchen. Thanks for sharing the tip and letting see a little more about you!
What a cool trick – I hate the way zippers move! Can’t wait to try it. Am following blogs today starting from Bonnie’s, what fun!
Thanks for the zipper tutorial. Love the Lapel Stick. I got some a few weeks back and it is a handy little project. I will have to try it on a zip. Thanks Amy!
Glad the birthday was great!
GREAT tutorial… and your sewing space… who KNEW such a creative person works in a corner of the KITCHEN!!!
Do you need some stash… seriously.. we can send you some.. wink!
Your zipper looks perfect!! What a neat little trick!
Isn’t that Lapel Stick great – it can be used for so many different things. I really enjoyed the Beatles video, brings back memories
Thank you for the zipper tip! Bonnie sent me!
Hi! Thanks for the zipper tip, it should come in handy….now I just need to find that lapel stick. Found you by way of Bonnie’s site and I’m glad I did. Thanks!
Hi Amy!!! Happy Birthday hugs to Owen – he’s such a sweet guy!!!
I love your ‘storage’ in your kitchen! I used to work in a corner of the dining room – all of my supplies fit in one end of the sideboard cabinet – now my kids are gone, and my sewing supplies take up almost every square foot of my house – even under the kitchen table! Things were a lot easier to find in that sideboard!
That’s a great product for zippers – I know lots of folks avoid zippers but this could turn that around!
Amy,
Came over from Quiltville, but I do check in on you every now and then. In fact, I made your super simple sampler. Really enjoyed it. It is basted now, awaiting tying. I am actually contemplating adding a row of blocks to make it a little bigger. I have plenty of the same fabric left :). I have some traditional blocks picked out, like a churn dash and another star variation or two, and a zig-zag. I got a lot better on the 1/2 square triangles during the course of the project. Thanks for sharing your projects with us.
I am so excited to hear that you work at your kitchen table. I am glad I’m not alone in that. Your space is very tidy (unlike mine). That is quite impressive with all the quilting you do!
Hi there! I’ll have to check out that Lapel Stick as I haven’t seen it yet.
I thought I’d share what I use to install zippers too… I use Wash Away Wonder Tape by Dritz. It’s basically double sided tape that washes away. So far I haven’t noticed any “gunking” of my needles w/it which was my initial concern.
I always enjoy seeing what you’re up to :)
Denise
My studio migrates around the house, but it is currently the dining room. I love my lapel stick! Can’t wait to try it on a zipper. Brilliant!
I haven’t really considered using the glue sticks for quilting. I know there are those who use them for applique. Using the Lapel Stick for zipper application is brilliant!
Thanks for a great “Tip”!! Bonnie sent me, too!
No stash. That really shocks me in a good way. I’m impressed with your sewing space and creative tip. Thanks!
What a great tip for setting zippers! That is so neat that you get so much done without a sewing room, love your work. Pat sent me.
Hello Amy,
I loved reading the other ladies blogs today. There are some really lovely quilters in the group. Love all of their work(s).
hugz
Bonnie sent me. Thanks for the great demo of lapel stick. I’ll be back!
What a fantastic way to put zippers in. No more ripping out stitches because zipper went all wonky. Now I can actually make some cute zipper pouches. Thanks. I have a sewing room with a little water fountain,love the sound of water.
Great idea using the glue stick. I’ve been sewing 50+ years and every once in a while the zippers get to me. Thanks for sharing. Bonnie sent me here, I’m glad I came to visit.
i’m new here and i already love it. can’t wait to get to your tutes. i have a huge area for my sewing, stashing and creating. still there are days i can’t find a space to sit my glass of water down, ha. remember the day when my sewing machine (in a cabinet and a stool with some storage) was in the corner of my kitchen and my stash in black plastic bag thrown in a closet.
There are some really lovely quilters in the group. Thanks.
Hi Amy, your zipper tips tutorial may be years old but it is the gift that keeps on giving! Just the advice I needed after a dreadful zipper slipping calamity last week left me with a carefully pieced zipper pouch chucked in the bin after numerous botched efforts with the zipper foot slipping off the side of the zipper and all the pieces smooshing about (tiredness due to non-sleeping baby had left me in a frazzled state where I should not have been at the machine anyway). Gluestick to keep the layers together is so much more appealing than basting (as I’ve done in the past), you’ve restored my enthusiasm for making zipper pouches! Thank you for a fantastic blog, I am so impressed that you find time for it as well as managing four kids! (I’m less than a year into having three – the amount of washing for five people leaves me she’ll shocked!) (Can you tell this is the rambling of a woman up at 4am? Baby asleep, time I stopped with the quilt blogs and put the iPad down now…)