If you're new here, you may want to check out my quilt pattern shop. Thanks for visiting!
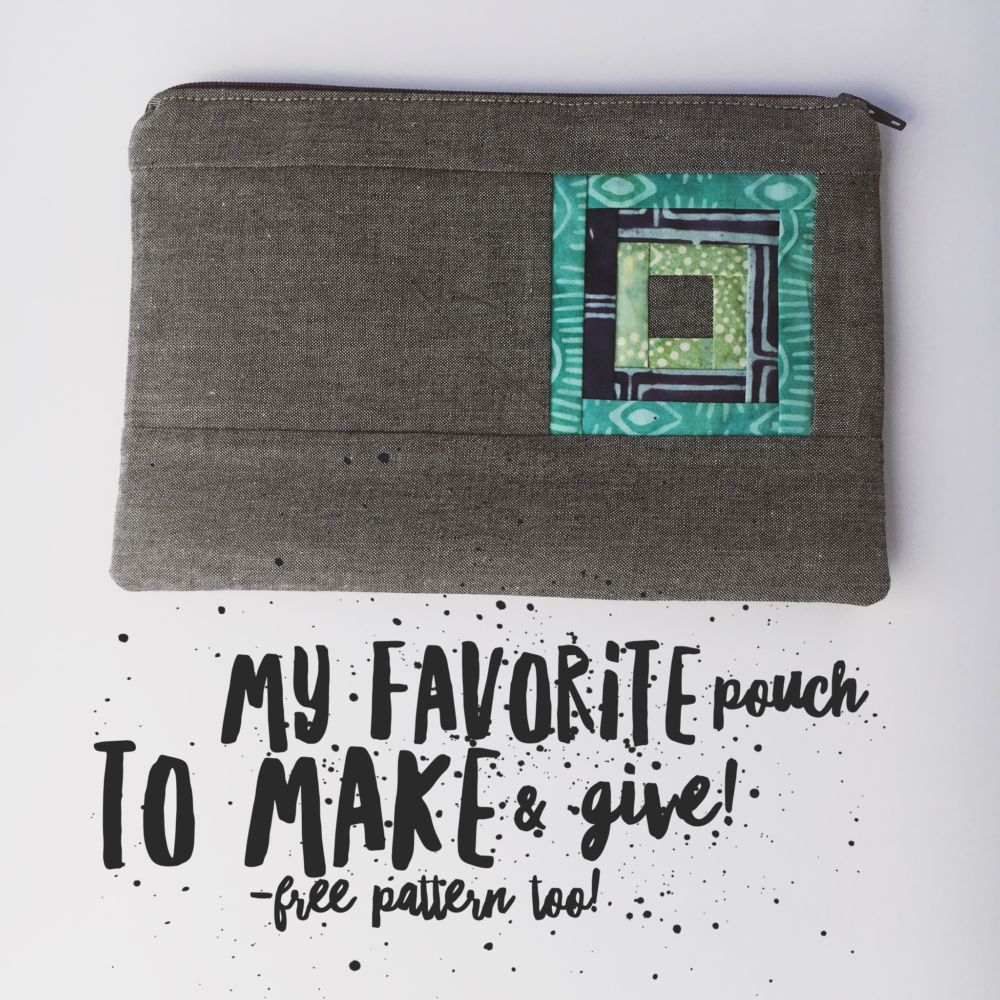
Last month when I posted my iPad case, I offered and you requested a tutorial, and I’m so happy to make good on that promise today! I have instruction to make this pouch in iPad size and laptop size, along with a little math to help make a perfectly sized pouch for your favorite electronics!
Supplies:
Variety of fabrics, scraps, fat quarters, or yardage.
1 yd of interfacing, (I used pellon, DecorBond) if using a different sort, take note of the width, and make sure you have enough length.
2 layers of batting
4-6″ of sew in velcro
——
Before we start with the instruction, what size is your device?
***
My iPad2 measures 9.5″ x 7.25″
I cut my fabrics at 11″ x 19″
to use strips for the exterior, I cut 8, 3″ x 11″ strips then trimmed to size.
***
My laptop measures 15.5″ x 10.5″
I cut my fabrics at 18″ x 27″
to use strips for the exterior, I cut 9, 3.5″x18″ strips, pieced then trimmed to size.
***
Measuring my laptop, I went half way down to figure in the depth.
Before you begin, measure your device.
If it’s not the same as mine (quite likely!) pull out the calculator.
L x 1.15=
W x 2.6=
Write down your numbers then round up or down a little to make it simple. I usually round to the nearest 1/4″.
—–
Ready to get to the fun stuff? No matter the size, the directions are the same!
Cut your fabrics, then piece the exterior, and lining if necessary. My solid pieces are used in the lining.
Usually I love starch, BUT with this cover, I was mindful not to use any starch. In fact you may consider washing your fabrics prior to using if you are lint conscience.
Piece and press your seams open.
Then add interfacing, to both the exterior and lining. Take your time to make sure the interfacing is properly affixed.
Next, add two layers of batting to the exterior piece. Baste, and quilt! I used simple straight lines since the fabrics are plenty busy.
After quilting, trim away the excess batting.
Then add a curve to one end of both the exterior and lining, by using a dish or cup from the cupboard.
Like so –
Next, we need to add the velcro. Placement of the velcro depends on the size, so get your gadget, and fold the layers around, to decide where to put it. Also if you want to add embellishment like my hexagons, now is the time to do so!
The exterior velcro goes on the straight edge, a few inches down, depending on your gadget. And the lining piece is positioned about an inch away from the edge of the curved end.
Slowly sew the velcro in place, making sure to secure it with extra stitches.
Finally it’s time to sew up the sides! For the laptop case my pocket is 8.5″, the iPad pocket is 6.5″. Again trying it on your gadget is a great way to find the right pocket size. When sewing the lining, leave an opening in one side so you can turn it right side out. I used 3/8″ seam allowance when sewing up my covers.
Sew about an inch at the top and bottom, and reverse to lock the stitches. It will be a tight squeeze turning it right side out!
Also, leave 3/8″ unsewn at the top of your pocket, this will help later, but if you forget (like I did) the seam ripper will help!
Turn the lining right side out, then tuck inside the exterior. Pin around the top of the pocket, and the flap.
Move to the sewing machine, and sew around the entire length.
Turning those corners will be tight, just take your time, stop to adjust as necessary.
Now, clip the excess away from the bottom corners, and turn right side out!
It is a little awkward at first, but keep going! Next, close the opening in the lining.
Tuck, pin and sew. Then tuck the lining inside, and press.
I like to pin before I topstitch, so I can ensure that the lining stays where I want it.
Topstitch and you are done!
Any questions? I’ll answer those in the comments! I hope you have some fabrics in mind for your favorite device!
Have you been following along with Travel Handmade? Check out the other posts and be inspired to sew a new bag today!
Thanks for the tutorial! I made this up using leftover fabrics from my Modern Maze quilt. I used a single fabric, quilted in a simple diamond design. Then appliqued a coordinate and a fussy cut flower on it. Lined it in red batik and quilted that too in a straight/wavy line design. I made mine to fit the iPad with the black cover I got with it. Here’s my version:
Awesome tutorial, Amy. I just got my husband an iPad, and he just got me a gift certificate to my LQS as a thank you. So…I’ll be using this tutorial to make him a cover for it. Thanks!
I really like the style of this bag. With a little tweaking I could make it a shoulder carry with a pouch for ear buds and charger. This design is my favorite and I’ve looked at many.
Loving these covers and have started making one for my mum’s iPad… But, I am stuck! From the ‘do not sew here’ picture. A little more info or help please :) Justnew to this sewing thing and am a little confused :O
I love this case…but the tutorial is very confusing to me. Can someone please explain in more detail how this goes together. Do I sew the inside and outside separate then combine? Right sides together? I am stupefied and would love to finish my bag. any help would be appreciated. Everyone else seems to get it, but I don’t..help!
Karenya Trionfante
January 25, 2022 at 8:54 pm - Reply
I don’t get it either, I’m stuck in the same spot.
Amy, will you please clarify the “ putting it together section.
I’m glad I’m not the only one!!!
Cute, and effective little iPad cover. I searched quite a while for a good case, and this one was exactly what I was looking for, well padded and eay to slip the iPad in and secure it. The only problem I had, was the directions that started when sewing the pocket. I ended up top stitching the whole thing, then making my pocket and sewing it down. So not as finished looking as yours but it works. This one is for a guy I work with, it was my prototype some will be happy with it regardless…. Now I need to make myself, my sis and 2 daughters one. I used plaid and checks, looks awesome (flannel & brushed cotton)
And further assistance with directions on assembling it will be greatly appreciated. Thanks! Sheri
I love the cover but I am confused as to how to sew the lining and the pocket. I would so appreciate some further direction such as the sewing order? am I sewing the lining and pocket seperately and then slipping in? Any additionalmdirection would be of great help.
I’m trying to figure out how to better explain it! With the pieces separate, turn the lining right side out, and tuck it into the exterior (still wrong side out), it will be all backwards looking, but it’s right. Then pin and sew around the raw edges, and turn it right side out via the opening in the lining.
If you haven’t started yet, it makes more sense with the pieces in hand, at least to me :)
Frustrated. Please, please add pictures of each step sewing the lining seperately then the exterior and then how you put them together. I love these cases…very cute, but have spent half my day sewing then ripping, sewing then ripping. I just can’t figure it out and I’m not new to sewing.
Leora Mc Elroy
January 22, 2013 at 2:10 pm - Reply
I love this case, but i am a little lost, where did the lining come in, i got lost a do not sew here pic. and how your lining is like two colors, how do yoy make the pocket???? I am just confused
I must admit to being initially perplexed…BUT…suddenly I could see exactly what you meant and then noticed your further explanation for someone working on the bag and I was on the right track! So I used the idea to make a mobile phone pocket for a friend. Some tight stitching round the corners on the machine, but it worked well and I’m hoping he’ll be thrilled with it. I didn’t top stitch it, as I don’t think he’d notice and I didn’t fancy a broken needle on the thicker bits. Thanks so much. I now can do something new and there are endless possibilities, I’m sure.
Attractive component to content. I simply stumbled upon your blog and in accession capital to claim that I acquire actually enjoyed account your blog posts. Any way I’ll be subscribing for your augment or even I fulfillment you access consistently rapidly.
How in heavens name do you sew through such thick layers of fabric and batting? I have a Janome machine and I tried a heavy needle but no luck. I bound the edges with ribbon embroidery since I couldn’t get my machine to sew through all the layers. . Your dimensions were a little small for the iPad. Cute idea.
I love this bag. I finally got it to work for me after I asked a wonderful friend to help. She and I came up with this.
sew around the flap first then sew the pocket inside lining on both sides. Then so the exterior pocket. This is all done inside out. it works. I wish the instructions had said this It would have been a quick and easy project for me. The bag is adorable.
10 cents to safe a customer and to dazzle them seems
like a bargain to me. In purchase to distinct them, you can run them over some
burning sage for a minute or two. Social and or financial
benefits might come to you this 7 days.
I love this bags, and have been wanting to make a bag for my laptop but would like straps to carry the bag, How would you recommend adding an over-the-shoulder strap? And something else I just thought of, is there room in the bag for the charger cord?
Thanks so much for all your hard work!
You totally lost me on how to put it together. I blundered along and sadly, have a piece of work that isn’t very good. I thought it was just me, until I read the comments. It’s a real cute project, but the tutorial needs to be a little more detailed.
Karenya Trionfante
January 27, 2022 at 11:40 am - Reply
The laptop quilt cover was a clever idea, however, clearer directions on how to put in the lining would have been helpful. I figured out my own way of completing the cover. Also the folds of the laptop were so thick that it wouldn’t fit in the sewing machine. So I hand sewed all the thicker parts, had to use craft plyers and a bigger needle to assist with the edges.


This is such a pretty accessory!
I love these…PINNED
Those are really beautiful! Thank you for a tutorial!
the bags are very nice.
thanks for the tutorial
Thanks Amy – I’m going to make one!
I might make one of these and slide my laptop into my diaper bag completely protected for trips. It looks pretty and simple!
Wow. This is wonderful. Excellent tutorial. Thank you so much.
Thanks for the tutorial! I made this up using leftover fabrics from my Modern Maze quilt. I used a single fabric, quilted in a simple diamond design. Then appliqued a coordinate and a fussy cut flower on it. Lined it in red batik and quilted that too in a straight/wavy line design. I made mine to fit the iPad with the black cover I got with it. Here’s my version:
http://www.flickr.com/photos/62399458@N07/6070552810/in/set-72157626513543139
Awesome tutorial, Amy. I just got my husband an iPad, and he just got me a gift certificate to my LQS as a thank you. So…I’ll be using this tutorial to make him a cover for it. Thanks!
I really like the style of this bag. With a little tweaking I could make it a shoulder carry with a pouch for ear buds and charger. This design is my favorite and I’ve looked at many.
its so nice but i couldent under satnd how did u make steps 11 12 13 14 can you explain more with picturs
Loving these covers and have started making one for my mum’s iPad… But, I am stuck! From the ‘do not sew here’ picture. A little more info or help please :) Justnew to this sewing thing and am a little confused :O
I love this case. Thank you so much for a really great tutorial.
I especially love that you shared the equation to make different sizes.
I made two of these for Mother’s Day and both are now treasured items.
Would it be okay if I added a linke to this tutorial on my blog page called “Tutorials I love”?
its at http://lizofdandeliondaydreams.blogspot.co.uk/
Kind regards
Liz
xxxx
I love this case…but the tutorial is very confusing to me. Can someone please explain in more detail how this goes together. Do I sew the inside and outside separate then combine? Right sides together? I am stupefied and would love to finish my bag. any help would be appreciated. Everyone else seems to get it, but I don’t..help!
I don’t get it either, I’m stuck in the same spot.
Amy, will you please clarify the “ putting it together section.
I’m glad I’m not the only one!!!
Cute, and effective little iPad cover. I searched quite a while for a good case, and this one was exactly what I was looking for, well padded and eay to slip the iPad in and secure it. The only problem I had, was the directions that started when sewing the pocket. I ended up top stitching the whole thing, then making my pocket and sewing it down. So not as finished looking as yours but it works. This one is for a guy I work with, it was my prototype some will be happy with it regardless…. Now I need to make myself, my sis and 2 daughters one. I used plaid and checks, looks awesome (flannel & brushed cotton)
And further assistance with directions on assembling it will be greatly appreciated. Thanks! Sheri
Amy,
I love the cover but I am confused as to how to sew the lining and the pocket. I would so appreciate some further direction such as the sewing order? am I sewing the lining and pocket seperately and then slipping in? Any additionalmdirection would be of great help.
Thank You so much for this beautiful pattern
I’m a little bit confused as to how the lining and exterior are sewn together, too! Can you add a few more details???
I’m trying to figure out how to better explain it! With the pieces separate, turn the lining right side out, and tuck it into the exterior (still wrong side out), it will be all backwards looking, but it’s right. Then pin and sew around the raw edges, and turn it right side out via the opening in the lining.
If you haven’t started yet, it makes more sense with the pieces in hand, at least to me :)
Good luck!
Frustrated. Please, please add pictures of each step sewing the lining seperately then the exterior and then how you put them together. I love these cases…very cute, but have spent half my day sewing then ripping, sewing then ripping. I just can’t figure it out and I’m not new to sewing.
I love this case, but i am a little lost, where did the lining come in, i got lost a do not sew here pic. and how your lining is like two colors, how do yoy make the pocket???? I am just confused
I must admit to being initially perplexed…BUT…suddenly I could see exactly what you meant and then noticed your further explanation for someone working on the bag and I was on the right track! So I used the idea to make a mobile phone pocket for a friend. Some tight stitching round the corners on the machine, but it worked well and I’m hoping he’ll be thrilled with it. I didn’t top stitch it, as I don’t think he’d notice and I didn’t fancy a broken needle on the thicker bits. Thanks so much. I now can do something new and there are endless possibilities, I’m sure.
Attractive component to content. I simply stumbled upon your blog and in accession capital to claim that I acquire actually enjoyed account your blog posts. Any way I’ll be subscribing for your augment or even I fulfillment you access consistently rapidly.
I wish I was talented as you :-) Very creative! Do you have any suggestion to harden the cover? Would an illustration board do?
How in heavens name do you sew through such thick layers of fabric and batting? I have a Janome machine and I tried a heavy needle but no luck. I bound the edges with ribbon embroidery since I couldn’t get my machine to sew through all the layers. . Your dimensions were a little small for the iPad. Cute idea.
I love this bag. I finally got it to work for me after I asked a wonderful friend to help. She and I came up with this.
sew around the flap first then sew the pocket inside lining on both sides. Then so the exterior pocket. This is all done inside out. it works. I wish the instructions had said this It would have been a quick and easy project for me. The bag is adorable.
thanks for the patter.
Brandy
10 cents to safe a customer and to dazzle them seems
like a bargain to me. In purchase to distinct them, you can run them over some
burning sage for a minute or two. Social and or financial
benefits might come to you this 7 days.
Stop by my blog; psychic source network
I love this bags, and have been wanting to make a bag for my laptop but would like straps to carry the bag, How would you recommend adding an over-the-shoulder strap? And something else I just thought of, is there room in the bag for the charger cord?
Thanks so much for all your hard work!
You totally lost me on how to put it together. I blundered along and sadly, have a piece of work that isn’t very good. I thought it was just me, until I read the comments. It’s a real cute project, but the tutorial needs to be a little more detailed.
The laptop quilt cover was a clever idea, however, clearer directions on how to put in the lining would have been helpful. I figured out my own way of completing the cover. Also the folds of the laptop were so thick that it wouldn’t fit in the sewing machine. So I hand sewed all the thicker parts, had to use craft plyers and a bigger needle to assist with the edges.