
Hi there! I can’t seem to keep up with this week! Last weekend my parents and sister were visiting, and my mom and I talked a lot about bindings. I thought I would share a few of my tips for a seamless, and square finish to your quilts with a hand-stitched binding. If you need more thorough directions for binding your quilt, view my tutorials for Sewing Binding to a Quilt, and Hand-stitching a Binding.

I am right handed, and work from the right to the left. If you are left handed, work from the left to the right, so that you are pushing the needle across your body.
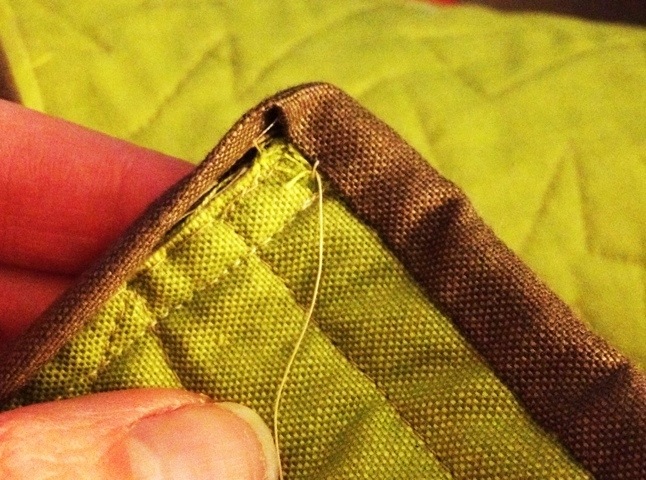
As I come to a corner, I secure the binding in the seam allowance, by taking an extra stitch. This ensures that I won’t move it while stitching the corner in place, and for all the future wear and tear…aka well loved quilt!
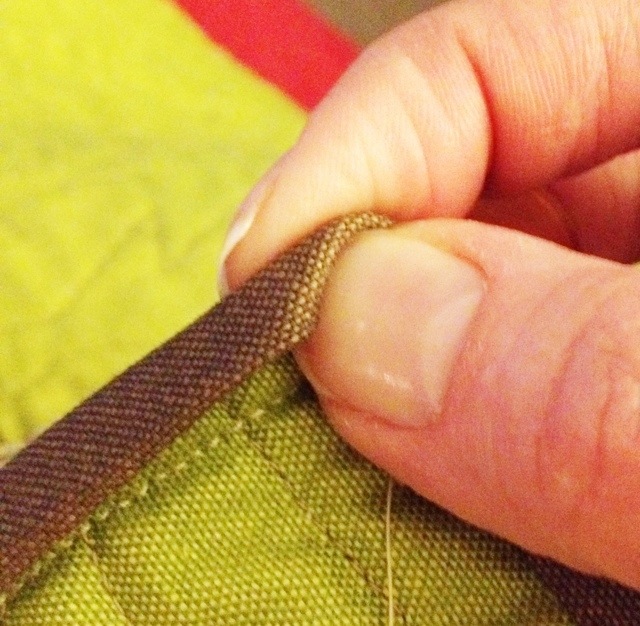
Once secure I use my thumbs to press it flat to the end, then the other thumb to lay the fold over, and match the edges up.

If it doesn’t lay flat and square the first time, let go and try again. On occasion, my seam allowance is too large to allow the fabric to fold flat. If this is the case, carefully pull back the binding and clip the layers, just slightly, then repeat the above steps to try your fold again. If it is necessary to clip, be sure not to cut the fold in your binding, only the seam allowances.
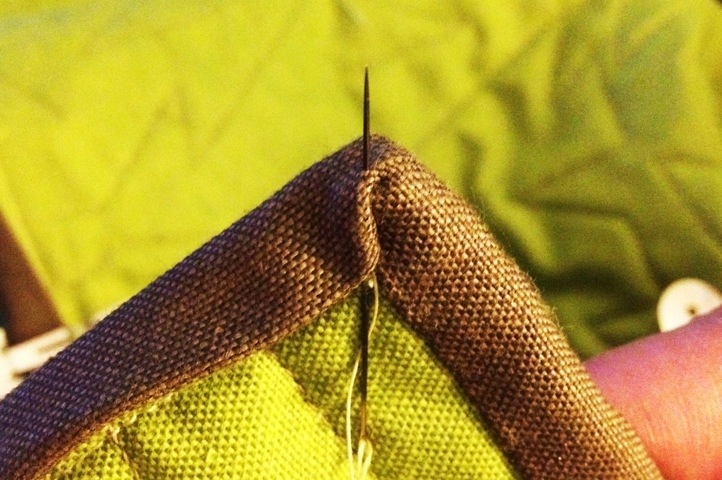
To secure your corner, starting in the backing, thread the needle through the fold, then down into the other layer, and back up.
Then back down through the corner, ending in the backing.

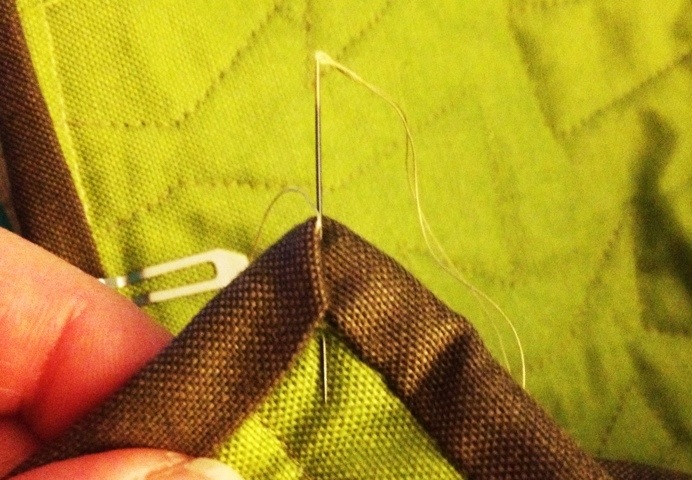
Continue working a ladder stitch, up the next side!
I hope this helps some of you in your binding challenges. I love sitting with a quilt while I bind it – I hope it’s an enjoyable process for you too! Let me know if you have questions in the comments, and don’t forget about the links at the top if you need more direction.
Happy Quilting ~ Amy
Thanks! I love doing the binding, and its always a good to be shown techniques to help make things look better.
I dont enjoy the binding part. I actually procrastinate finishing a quilt just because of that. Yesterday I spent 7 hours binding 4 sides leaving the corners for last. (still undone) I will just go to Prayers & squares today for the others input. usually I just bring em in done, but this has got to be easier & I am just missing something. Thanks for your photos they may be of help.
This is exactly how I do my corners as well. Though, I don’t think anyone taught me, I just figured it out myself. :) I’m glad I’m not the only quilter who enjoys stitching the binding by hand. I just can’t get the hang of machine stitching it down.
Do you do the hand stitching on the front or the back of the quilt? I do mine on the front. I like being able to see it as it’s finished.
I enjoy doing this by hand…thanks for the tips!
got two great tips from this. Thanks
Great tips, Amy – very helpful!
I also enjoy the binding process. Any part I can sit and relax and do by hand I love. These are great tips!
I am right handed but like to work left to right… totally backwards! :)
Wonderful bingding tip, thank you!
Have a great day.
Always, Queenie
This is exactly how I do my corners. Good to know it’s a recommended way! :)
Thanks for all your lessons’! Honey…I’m getting there. Worked on my little art quilt a bit yesterday.
Got great tips from this posting! I never thought about using a ladder stitch instead of a blind stitch! Thanks!
I just did some binding today. I do as you do but I haven’t ever tacked the corner with the technique you mentioned. I will try that on the remaining two corners. Thank you
Stitching down the binding is one of my Favorite parts of Quilting. That means the quilt is nearly DONE and ready for cuddling. Do you fold the MITER in the same direction as the opposite side or reverse it to have less Bulk? I’ve done it both ways.
It would seem I stitch left-handed (but I’m right handed!) LOL Guess it doesn’t matter, but it was interesting to learn the difference :o)
Very helpful info! I’m getting ready to stitch a binding tomorrow & I saw a tip here that will help much with my corners. Thanks Amy.
Thank you for a great explanation. I was looking online for a similar idea and really appreciate it
Custom Embroidery Digitizing