
Quilt bindings are the most magical, and sometime confusing part of quilt making, especially for a new quilter! I shared a tutorial a few years back, but have adapted and made a few changes as I’ve grown as a quilter, and thought it was enough to update the post. Any tips or suggestions you might have, I’d love to hear them in the comments!
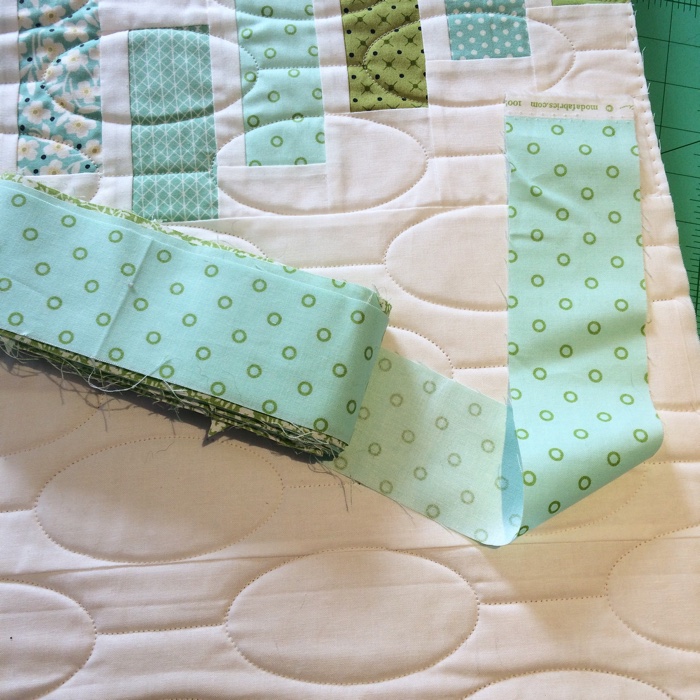
The first change I made is I cut my strips at 2 1/4″ now, instead of 2 1/2″. I found that my bindings were feeling a little floppy, and not full, so I tried it and liked it better. It’s amazing how much a difference 1/4″ can make in the binding details.
To begin, leave 10″ -12″ of binding not stitched down, to complete later. I usually like to start in the middle of a side, or the bottom, away from a corner. Use 1/4″ seam allowance.
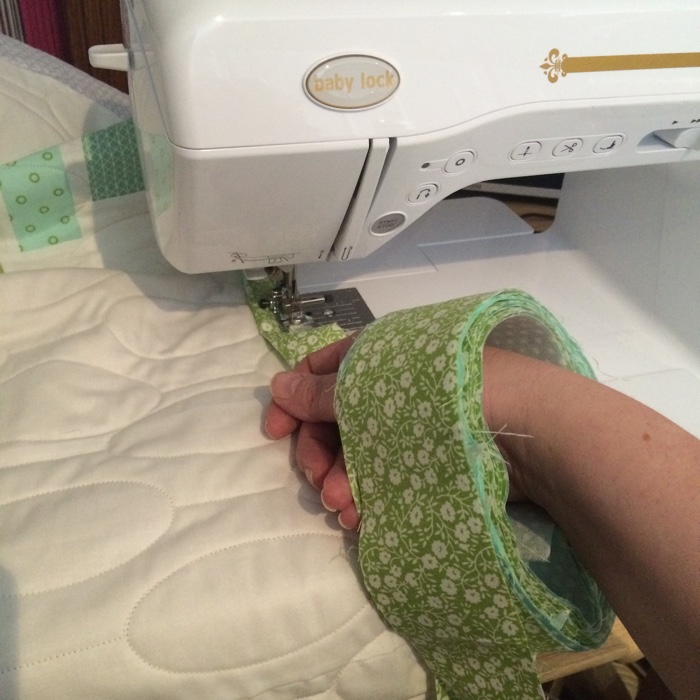
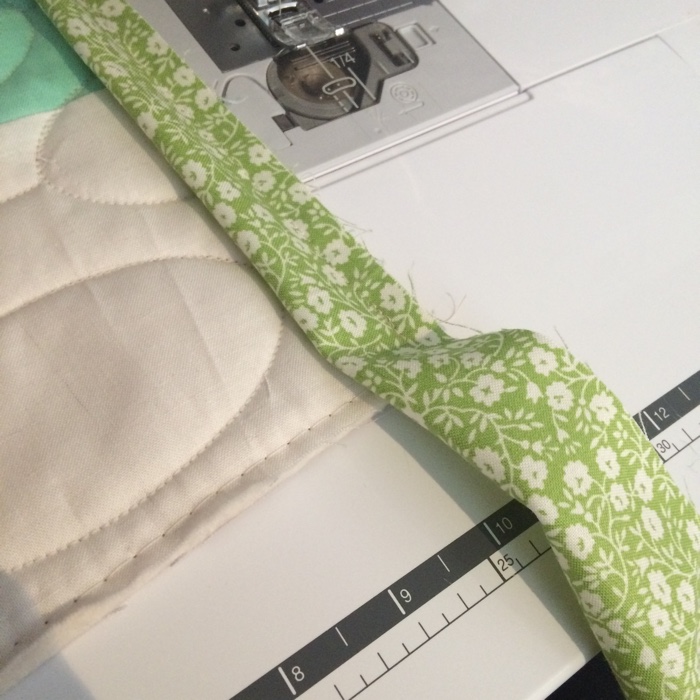
Another big change, I stopped taking the time to press a crease down the length of the binding. It can take forever, depending on how big your quilt is, and I’m usually binding quilts in multiples, so it takes even more time. I also like having a nice open pocket for stitching through by hand. Instead I fold the binding as I attach it to the quilt top.
To keep the binding tangles to a minimum, I wrap the binding around a 6″-6 1/2″ ruler and then wear it as a bracelet on my wrist. Be sure to pull the length out, instead of letting it unwrap and twist off the roll. An arm length will do.
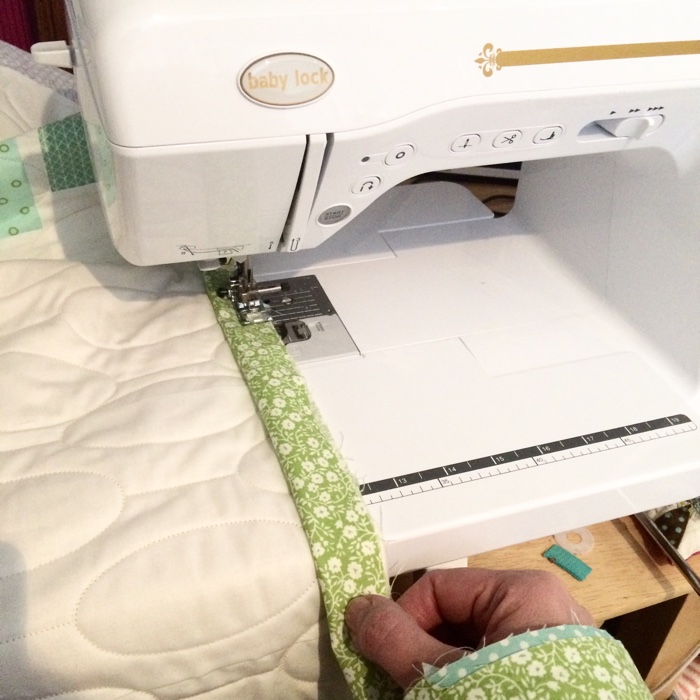
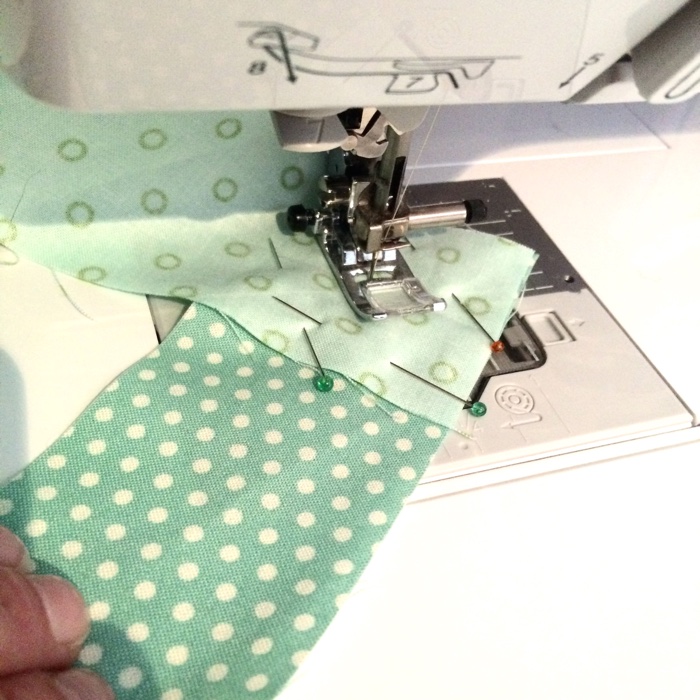
I’m always stopping to adjust the mass of quilt, and it is in those moments that I fold the binding as well. Line it up, nice and straight and keep stitching. Using the needle-down position on the machine is super helpful for keeping the quilt in place, and the seam straight.
When I arrive at a corner, I stop stitching 1/4″ away from the edge of the quilt. Backstitch to secure the stitches, and cut the thread to make the miter.
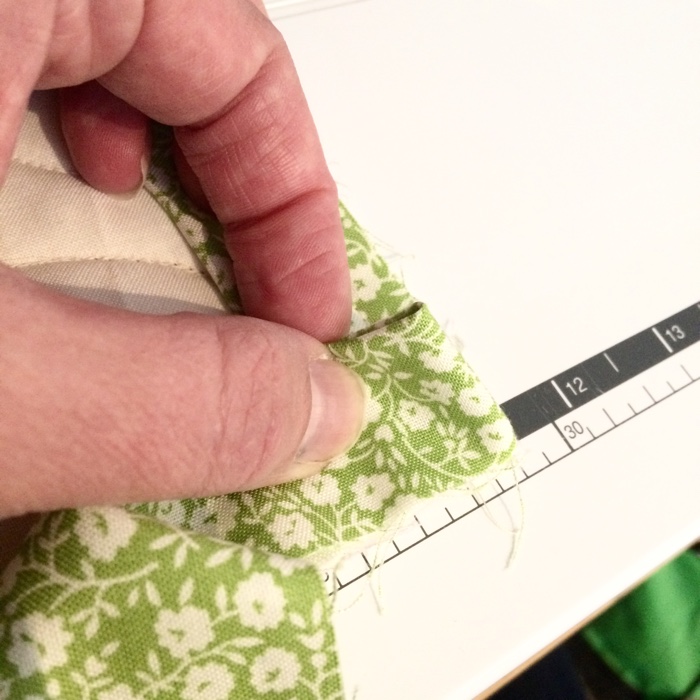
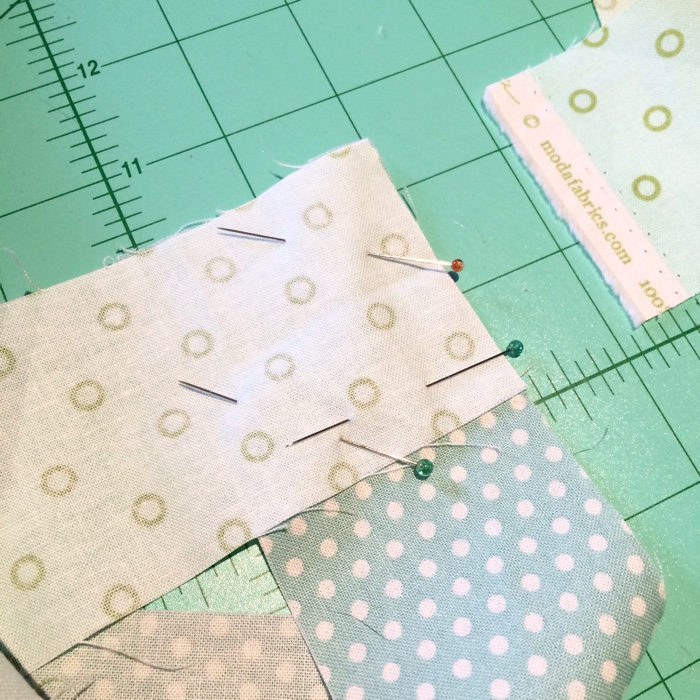
I pinch the corner, so that the edges line up, and the fold lays flat.
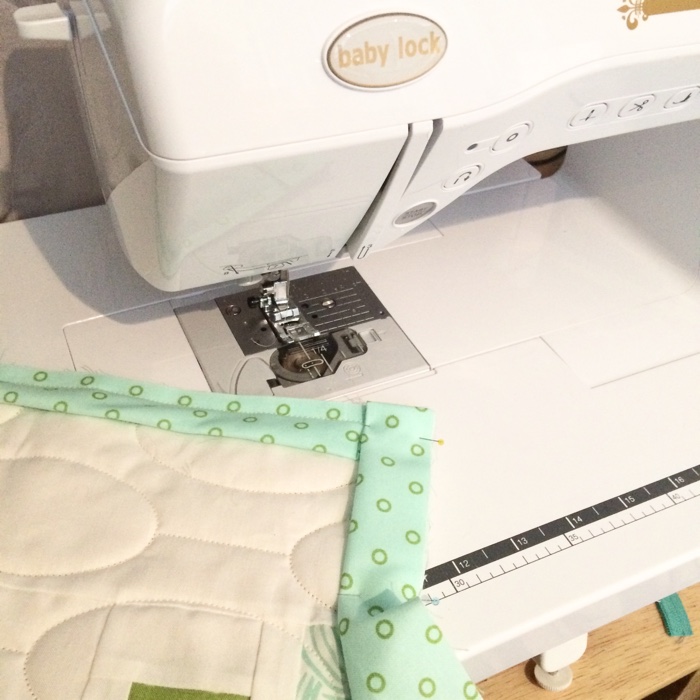
I don’t use a lot of pins to sew the bindings, but in this space I do! I want to be sure nothing is shifting as I go back to the sewing machine.
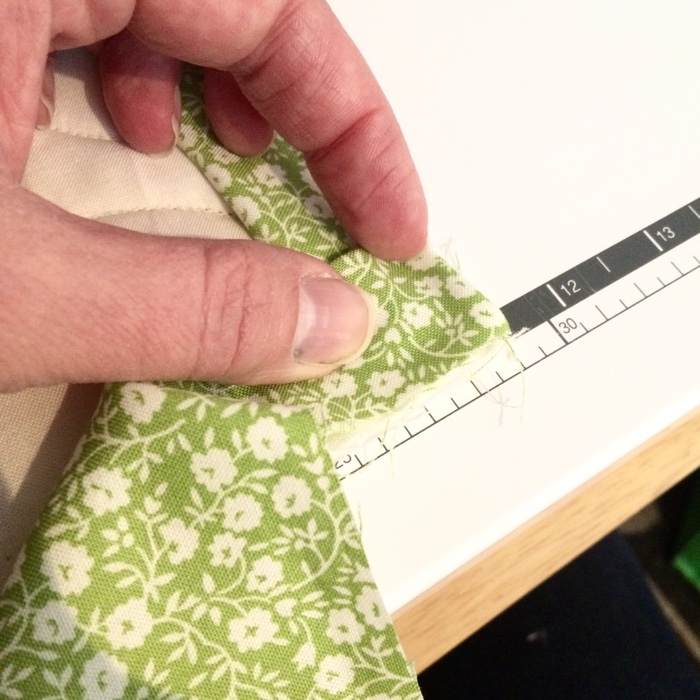
Start stitching 1/4″ away from the edge, and back stitch to secure once more.
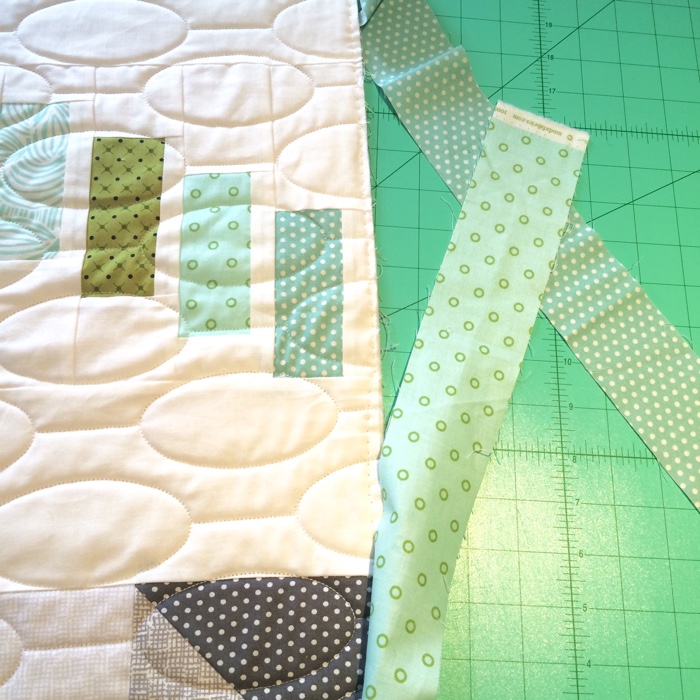
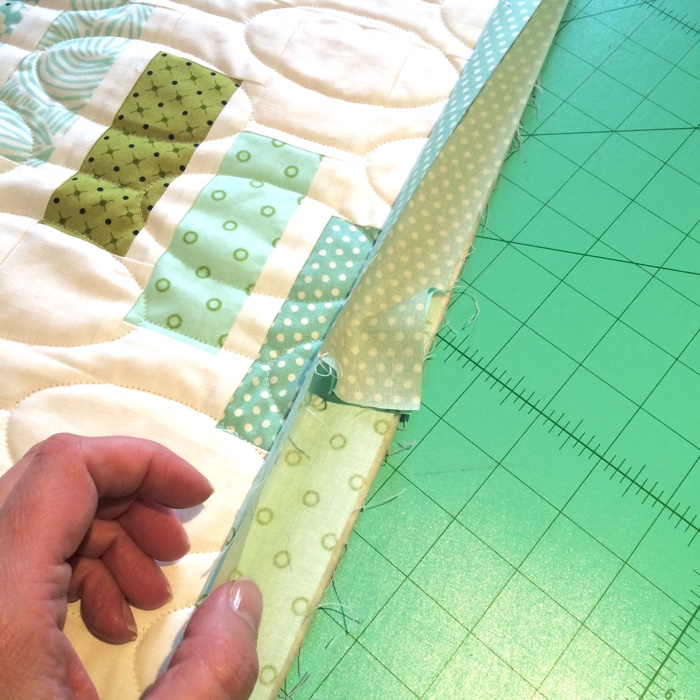
When you arrive back at the beginning, you should have 12″-15″ unstitched, and plenty of binding to overlap the space from both sides. Lay your quilt flat on a table, with plenty of room to work. 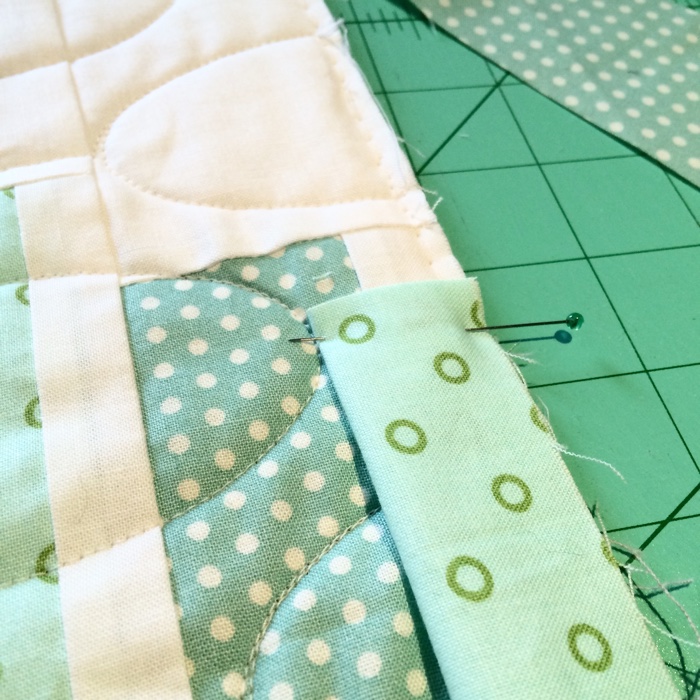
Cut one length of binding, so that it ends in the center of the unstitched space. I always add a pin here to keep it in place. It should be pulled flat, but not be stretched out.
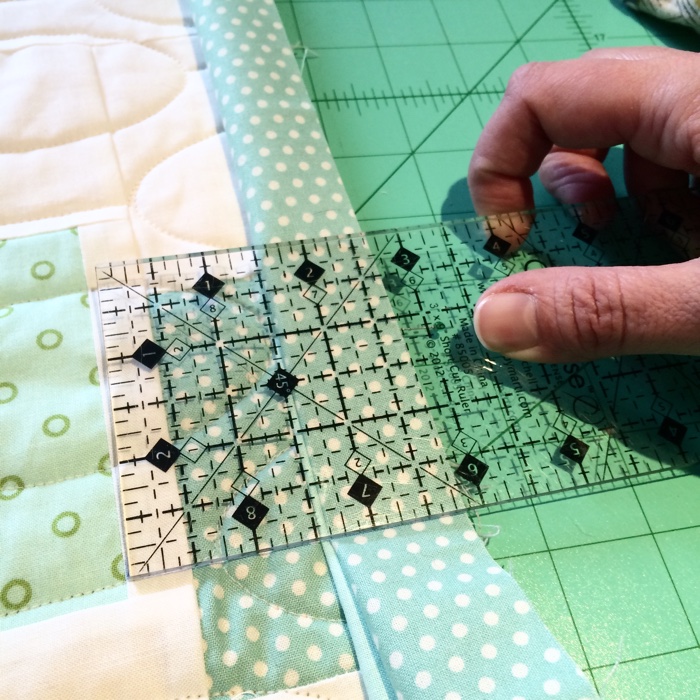
Lay the second piece of binding over the top, again pulling it smooth, but not stretching the fabric. Measure the overlap, to match the width of the binding. In my case 2 1/4″.
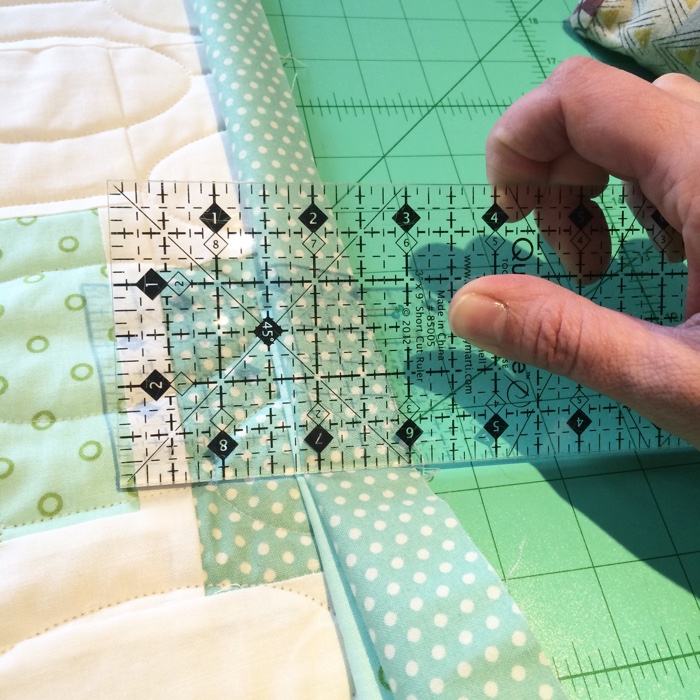
Mark the length to cut, you can use any marking tool, I prefer to quickly crease the binding with the edge of the ruler.
Then trim away the excess.

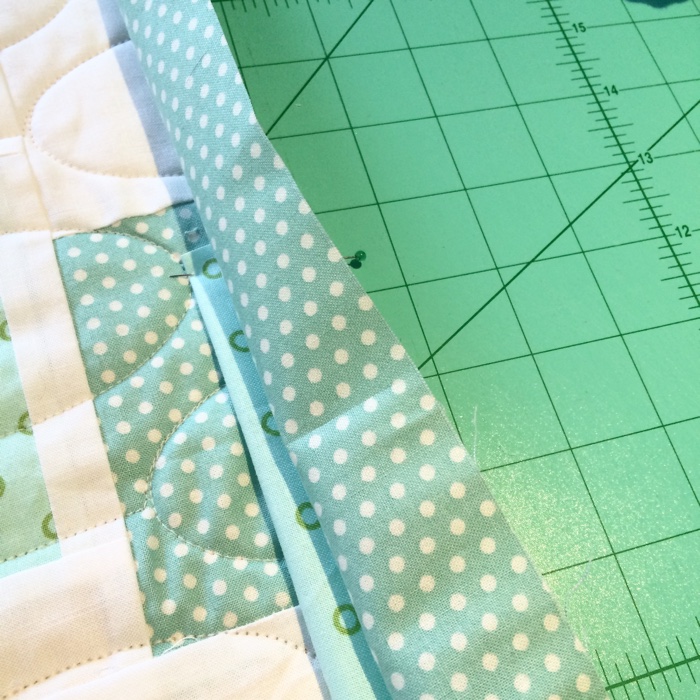
Now release the first piece of binding, to sew the pieces together on a diagonal.
Careful not to twist the pieces (I’ve only done that once!), lay them right sides together matching the corners and edges as shown. Add a couple pins to keep things secure, then move the entire quilt to the sewing machine again.
Stitch from corner to corner, you may want to mark the center line, but it gets easier to eyeball with experience.
Remove the pins, and verify the length fits your quilt. If for any reason your binding isn’t fitting, or the line of the binding isn’t to your liking (say if you missed a corner when stitching) quickly take out your stitches and try again. It’s a forgiving process, and can take some practice.

Once you are happy with how it fits, trim away the excess binding, and press the seam allowance open.

Pin the binding in place to reduce puckers as you arrive at the starting point, and stitch in place.
If you need help with hand stitching I have a tutorial about that here, and also a post specifically about stitching the corners. They can be the trickiest to get right!
Hopefully that helps! I’m planning a machine binding tutorial for next week, I hope you’ll stop back by for more then!
Amy

The picture and instruction is not very clear when you twist the one end to attach to the other. In many tutorials this is the part that is skipped over the most. It would be helpful to see the twisted end on the quilt to make it more clear. You show it twisted on the cutting matt, but not on the quilt. Very confusing. But the rest of the pictures are very clear.
Hi Susan,
The key for the joining of the binding step is not to twist the binding in any way, otherwise it’s just right sides together to join them. Either side could be up or down depending on what feels natural to you. Hope that helps!
I agree with Susan P’s comment. it would be very helpful to see which way you turned the binding coming off of the quilt.
Amy – Today I was planning to attaching binding to a small quilt, so your tutorial was perfectly timed. I tried three things from your tutorial that were new to me, and they each worked wonderfully! First was not pressing the binding–like you, the openness of the edge was much better. Second was stitching the ends together. Seems like cutting the diagonal on the end of the binding strips before stitching is always a challenge for me. Your method was SO easy and it worked perfectly. Third was the loop on my wrist. I think with practice, I’ll get better at that, but overall it was much better than have the binding strip over my shoulder. So thank you very much for this!
I’m so glad you found my tips helpful! I’m always looking for a way to work smarter in my process :)
It doesn’t appear that you iron the binding before you hand bind it. I think this might drive me a bit nuts (I can see how it would work for some). I actually enjoy the binding part (anything after basting is DOWNHILL!!!!) so I don’t mind taking the time to iron the binding both before I attach it and after it’s attached via machine for hand binding. It’s funny which parts we enjoy as quilters.
Hi Lisa! I love binding too! The main thing that made me stop ironing the binding, was the nice fluffy pocket to stitch through with my hand stitches. It also naturally allows the fabric to give as I fold it around. There’s no right or wrong, just what works for each of us!
Thank you for this informative and easily understood lesson. I am new to making bias binding and to quilting projects in general. I absolutely love sewing and this is helpful demonstration will keep me dreaming of the many masterpieces I can create with colours and cotton
Thank you for sharing your expertise .
Interesting that you don’t fold your binding in half. I’ll have to try that next time I bind. I’ve also used the 2 1/2 inch rule and agree that the binding can feel empty. Any problems covering your stitch line on the back with the narrower width? You inspire the rest of us! Thank you.
Thank you…that was very interesting. May have to try the 2 1/4in width as I usually end up with a binding that is too full or it does not align properly in the back. I do not trim my quilt top until after the binding is on for that reason.
Thanks Amy. I’m going to try not pressing the binding in half next time to see how well that technique works for me. *fingers crossed*
So this showed how to attach the binding but doesn’t show how to then finish it off. Do you have any instructions or video showing the final finishing step. I have yet to make my first quilt with a binding. I’ve made rag quilts only which do not need binding. Help please.
Hi Rosemarie,
There are a couple of links near the bottom of the post with the next steps, and I have a video available here: https://youtu.be/UQ88rg421pI
Is the binding cut on he bias?
Thank you for the tutorial. I am new to quilting !
Always wanted to learn this way of binding the end. So easy and looks great!!!
Wow! You CAN teach an old woman new tricks ! Thx so much for great ideas
Yay!! This was super easy! I’ll never join binding any other way that this. Thank you so much