


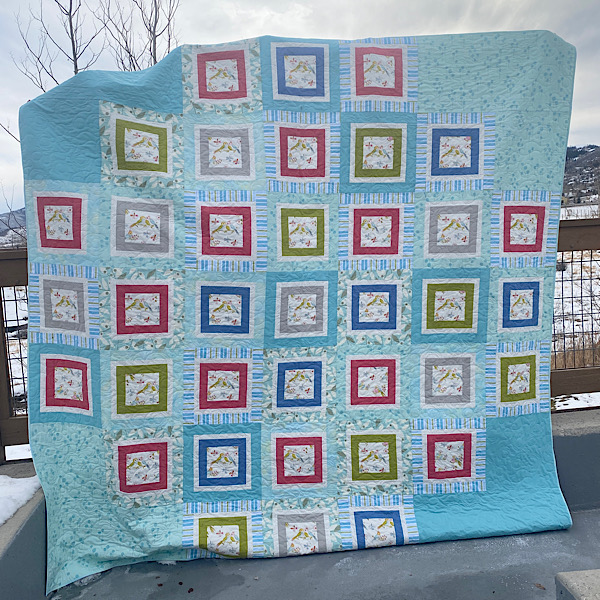
Love of Sewing Mini Quilt
I’m so excited to share my Love of Sewing Mini Quilt with you today! When I was first given the challenge, I had to think it through for a while. Thankfully, inspiration struck, and each block in my mini symbolizes a part of sewing that I love!
I’ve been sewing since I was a girl, with 4-H roots and a seamstress for a mom, I’ve loved sewing since I can remember. A favorite pass time has always been walking the aisles of the fabric store to touch, feel and explore the possibilities that can be done with fabric. Even true when I was in college and didn’t have resources to start new projects!
I started quilting daily for my sanity – while pregnant with my fourth baby, the few quilts that I had made were inspiring and making me excited to start more quilt projects. During that time the quilting projects were the only thing that stayed done, day to day. And seeing my family snuggled up with quilts I’d made was so rewarding! And still is!
The blocks included in this mini quilt are special. The friendship star represents the many friends I’ve made through quilting. The second star, and the log cabin block represent the tradition of quilting, which I love and hope to pass on to the next generation. The spool represents all the thread, that I’ve used over the years! The heart is my love for sewing, and the alternating nine-patches are the links the draw us together.
Piecing Settings
I thought I’d share my favorite piecing settings for the Destiny II. I use the J foot most often, select the sewing button on the home screen. Then on the right side of the screen there’s all the decorative screens that you can visit, or the Q at the bottom. Select Q, then the number 2 stitch. You can see both of those are highlighted in my photo.
On the lower left of the screen, I select the pivot feature by pressing the presser foot button. This is especially great for chain piecing, anytime I stop sewing the foot raises slightly, allowing me to insert the next pieces under the foot, and continue sewing. The knee lift is great for this too, but I love the automatic feature!
Finally, when I need to sew 1/4″ away from a marked line, I turn on the guide beam, and position it at 1.0mm. I keep the guide beam at the center of the unit, and have a beautiful 1/4″ seam allowance every time!


Heart Block
To make one heart block, you will need:
6 gold squares, 2″ x 2″
4 gold half square triangles, cut 2 squares at 2 1/2″x 2 1/2″, then cut on the diagonal once
2 gold quarter square triangles, cut 1 square at 4 1/4″x 41/4″, then cut on the diagonal twice
2 background half square triangles, cut 1 square at 2 1/2″ x 2 1/2″, then cut on the diagonal once
2 background half squares triangles, cut 1 square at 4″ x 4″, then cut on the diagonal once
1 background quarter square triangles, cut 1 square at 4 1/4″ x 4 1/4″, then cut on the diagonal twice
Make three heart blocks.
Layout the pieces as shown, to make the block.
Working left to right, sew the pieces into rows. Press the seam allowances in alternate directions from row to row as you sew.
Join the top three rows, press the seam allowances in one direction.
Add the bottom point of the heart, then the background triangles. Press to complete the block.
Friendship Star Block
To make one friendship star block, you will need:
2 yellow squares, 2″ x 2″
1 yellow square, 1 1/2″ x 1 1/2″
2 background squares, 2″ x 2″
4 background squares, 1 1/2″ x 1 1/2″
Make six friendship star blocks.
Pair the 2″ yellow and background squares together. Mark the diagonal, or use your guide beam, then sew 1/4″ away from both sides of the marked line. Trim your half square triangle units to 1 1/2″ square. THIS is my favorite way to trim HST units.
Layout the squares and HST units, as shown.
Sew the rows together, press the top and bottom rows out, and the center row toward the center.
Pin and sew the rows together, and press to complete the block.


Star Block
To make one star block, you will need:
1 center square, 2″ x 2″
4 squares for the star points, 1 5/8″ x 1 5/8″
1 background square, 2 3/4″ x 2 3/4″
4 background squares, 1 1/4″ x 1 1/4″
Make six star blocks.
To begin, make flying geese units with the large background square, and four small squares for points.
Layer two small squares over the diagonal of the large background square. Mark the diagonal or use your guide beam to sew 1/4″ away from both sides of the center line.
Cut them apart through the center, and press away from the background fabric. Layer the remaining small squares as shown, and again sew 1/4″ away from the center line.
Cut apart through the center, and press away from the background fabric. Trim to 1 1/4″ x 2″, as needed.
Check out my no-waste flying geese tutorial HERE for more detailed photos.
Layout the block as shown. Sew the units into rows, press the center row toward the center, and the remaining rows out.
Pin and sew the rows together, press toward the center to complete the block.
Spool Block
To make one spool block, you will need:
2 navy squares, 2″ x 2″
3 navy squares, 1 1/2″ x 1 1/2″
2 background squares, 2″ x 2″
2 background squares, 1 1/2″ x 1 1/2″
Make 6 spool blocks.
Pair the 2″ navy and background squares together. Mark the diagonal, or use your guide beam, then sew 1/4″ away from both sides of the marked line. Trim your half square triangle units to 1 1/2″ square. THIS is my favorite way to trim HST units.
Layout the squares and HST units, as shown.
Sew the rows together, press the top and bottom rows toward the center, and the center row out.
Pin and sew the rows together, and press to complete the block.


Log Cabin Block
To make the log cabin block, you will need:
2 squares, 1 1/2″ x 1 1/2″
2 rectangles, 1 1/2″ x 2 1/2″
1 rectangle, 1 1/2″ x 3 1/2″
Mix and match from your scraps for a colorful block.
Make six log cabin blocks.
Layout the log cabin block as shown. Sew the squares together side by side. Press away from the center square.
Sew a 2 1/2″ rectangle to the top of the square unit. Press away from the center.
Sew the remaining 2 1/2″ rectangle to the side of the center unit. Press away from the center.
Sew the 3 1/2″ rectangle to the top of the unit. Press away from the center.
Nine-Patch Block
To make the nine-patch block, you will need:
9 squares, 1 1/2″ x 1 1/2″
My blocks include, one gold, four grey and four background squares.
Make six nine-patch blocks.
Layout your squares as shown, sew the squares into rows. Press the top and bottom rows toward the center. Press the center row out.
Pin and sew the rows together, press the seam allowance out to complete the blocks.


Snowball Block
To make one snowball block, you will need:
2 grey squares, 2″ x 2″
4 grey squares, 1 1/2″ x 1 1/2″
1 gold square, 1 1/2″ x 1 1/2″
2 background squares, 2″ x 2″
Make six snowball blocks.
Pair the 2″ grey and background squares together. Mark the diagonal, or use your guide beam, then sew 1/4″ away from both sides of the marked line. Trim your half square triangle units to 1 1/2″ square. THIS is my favorite way to trim HST units.
Layout the squares and HST units, as shown.
Sew the rows together, press the top and bottom rows out, and the center row toward the center.
Pin and sew the rows together, and press to complete the block.
In my video today, I’m sharing the steps to ready your Destiny II for free motion quilting! With so much room between the arm and the needle, there’s no reason not to quilt your own projects. Big or small there’s plenty of room to jump in and quilt! Be sure to stop by Baby Lock, and explore that other amazing possibilities with the Destiny II!
Happy Quilting –
Amy

Thank you for this cute mini pattern- I have “mini mania” and will refer my fellow mini maniacs to your blog post! Your inspiration for each section makes it even cuter
fantastic …
Any chance that the Love of Sewing mini will be available as a PDF? Great little quilt!
I love this mini so much. I need to get organized so I can start on it. Thank you for making this tutorial!
Thank you for mini pattern
Very cute quilt, but I don’t see the overall dimensions of this “mini quilt” listed in this project. Our guild (and our county fair) requires that no block within a “ mini quilt” be larger than 4” square and that no side be longer than 24”. I cannot tell by just looking at the photo, if this project would qualify.